Get Connected!
Come and join our community. Expand your network and get to know new people!
-
MMOEXP Shop
- 1
- 164
- 0
- 0
-
Sound Packs
- 2
- 632
- 0
- 0
-
Themes
- 1
- 536
- 0
- 0
-
Wallpapers
- 2
- 700
- 0
- 0
-
Our Games & Apps
- 4
- 881
- 0
- 0
-
ThudNG2
- 0
- 766
- 0
-
Super Star Trek
- 0
- 824
- 0
-
q5go
- 0
- 804
- 0
DMZ runs in Hajin get a lot easier once you stop treating every building like a treasure chest. Pick a purpose, move with intent, and leave before your backpack turns into a junk drawer. I often use
CoD MW4 Bot Lobbies
to practise quick turns, quiet entries, and clean movement before taking those habits into a serious operation. The real win is not grabbing the most gear; it is reaching the exit with useful items, decent armour, and enough time to reset.
Build the Route Around One Need
Start by choosing what matters for this run. Need plates, med supplies, or a revive kit? Aim for medical buildings and nearby storage rooms. Looking for tactical equipment and ammunition? Police stations usually make more sense. Residential blocks are slower, but they can fill gaps with tools, cash, and mission items. You do not need to search the whole district. Pick one main target, then keep one nearby alternative in mind. That small decision stops the usual wandering, especially when the opening minutes feel quiet.
Think in short moves rather than one giant journey. Loot the first few rooms for basic protection, then rotate through connected buildings toward the main area. Keep walls, alleys, and parked vehicles between you and open ground. Listen before opening a door. Check stair landings, back rooms, rooftops, and side entrances; players often rush past those spots. Once your pack holds the key items, stop shopping. Mark an exit, reload, and move. Extra crates are rarely worth a late sprint across a busy street.
The Route Most Players Can Actually Repeat
The Meta: Fast station clears followed by residential sweeps.
The Snag: Greed keeps squads inside after the useful loot is gone.
The Fix: Leave with one spare slot and a marked extraction.
Reality check: Most failed runs are not lost in a gunfight; they fall apart when everyone keeps looting without a clock.
Route Choices at a Glance
Here is the quick version I use when deciding where to start. It is not a rigid rulebook. Spawn position, weather, and nearby activity can change the call, but the trade-offs stay pretty consistent.AreaBest ForMain RiskMedical buildingsHealing gear and recovery itemsBusy entrancesPolice stationsTactical equipment and ammunitionClose range fightsResidential blocksCrafting materials and mission itemsSlow room checksWeather changes the value of each route. Rain and fog make long crossings uncomfortable, so hug walls and use interiors whenever possible. In the Fallout zone, prepare the required protection before moving in, and decide how you are getting out before the first crate opens. If your squad already has strong equipment, skip the tempting detour. A safe exit protects the next run, while one extra room can cost the whole evening.
Questions Players Keep Asking
A lot of players wonder whether a longer route is worth taking when the first area feels completely quiet.
Usually not. Take the useful gear, keep your exit close, and only extend the route when your pack still has room.
Make the Route Second Nature
Run the same compact path several times and notice the details: which doorway gives cover, where sound carries, which roof exposes you, and how long the final rotation takes. After that, build a second route for blocked streets or heavy enemy pressure. Keep your inventory tidy, call out every turn, and avoid splitting just to search one extra room. Players looking to polish movement, map reading, and quick looting can also use
Bot Lobbies MW4
for focused practice, then bring those cleaner habits into Hajin when the stakes feel real.
Read More...
Mistfall Hunter players are still debating a matchmaking proposal that could change how gear feels across the game's difficulty levels. The idea is simple enough: put clearer limits on equipment, then let players learn each map without running into fully stacked opponents straight away. For anyone planning a careful stash,
Mistfall Hunter Gyldenblood Money
may help with broader preparation, but the real question is whether these limits make every run feel more worthwhile.
A More Readable Route Through the Game
The suggested path would start with Normal Hollow Grove, where blue gear sits at the top of the allowed range. From there, Brandergaard Normal would use the same blue ceiling, while Hollow Grove Chaos would open the door to Epic equipment. That gives players a clear reason to move forward instead of guessing when they are ready.
It also makes early failures easier to understand. If a fight goes badly, you can look at positioning, aim, stamina use, or extraction timing rather than assuming the other player simply had vastly better kit.
Why Brandergaard Normal Needs a Blue Ceiling
Brandergaard Normal could become a proper learning lobby under this plan. Green and blue equipment still matter there, and players can test weapons without risking their rarest items. Novice, Advanced, and Pro combat bags would remain available, so the rule would affect gear quality rather than remove useful playstyle choices.DifficultySuggested Gear LimitPlayer FocusHollow Grove NormalBlueLearn routes and basic fightsBrandergaard NormalBlueBuild confidence and practise extractsHollow Grove ChaosEpicPrepare for tougher encountersThe table shows why the proposal has caught attention. Each step has a purpose, and the jump from blue to Epic feels earned rather than random.
What to Bring Into Each Tier
Players do not need to chase perfect builds for every outing. A dependable weapon, sensible armour, healing supplies, and a bag that matches the mission will usually do more than an expensive setup used without a plan.
1. Use blue weapons to learn recoil and effective range.
2. Carry healing items before adding luxury upgrades.
3. Save Epic gear for routes you know well.
That kind of preparation keeps the pressure manageable. You can still make mistakes, but the cost of learning stays reasonable.
Chaos Should Feel Like a Real Step Up
Hollow Grove Chaos has a different job. It should test players who already understand the map, know when to disengage, and can read an approaching fight. An Epic cap would make the mode more competitive without turning every encounter into a contest between a starter loadout and a top-end collection.
Some veterans will dislike losing access to their strongest items in Chaos. That reaction is fair. Farming players often enjoy pushing familiar routes with their best equipment, and the restriction would take away part of that freedom. Still, a cleaner middle tier could make successful extracts feel more skill-based.
Small Habits That Matter More Than Rarity
Newer hunters often focus on item colour while overlooking the basics. Listen for nearby movement. Keep an exit route in mind. Do not burn every healing item during the first skirmish. A cheap build with good decisions can last longer than a costly one carried into the wrong fight.
1. Check your escape route before opening risky containers.
2. Leave early when supplies or health run low.
3. Rebuild your loadout after every serious loss.
What Changes for End-Game Players
Brandergaard Cataclysm could gain a stronger identity if Legendary and Holy equipment were mainly reserved for that level. High-end players would still have somewhere to use their best builds, while lower difficulties would remain approachable for people learning the game or returning after a break.
The proposal is not guaranteed, and community feedback will probably shape the details. Until the developers settle on a final version, it makes sense to practise each difficulty with gear that matches its intended level. Players planning future upgrades can also review
Mistfall Hunter Money
options carefully, then keep their spending tied to the maps they actually play.
Read More...
If you're working through Part Three of the Beantock event, the
GAG 2 Items
you prepare beforehand matter more than rushing into the first basket. This Grow a Garden 2 Old Man NPC Delivery Guide focuses on the new Old Man NPC, his 30 fruit requests, and the easiest way to keep your delivery chain moving when weight and mutation requirements start appearing.
How the Old Man Delivery System Works
The Old Man NPC accepts requested fruits through the giant's basket. Each completed request moves you one step forward, and there are 30 deliveries altogether. You need to check the current request carefully, because some fruits must meet a specific weight or arrive with a required mutation.
After each successful hand-in, you pick one reward from three available choices. Don't harvest a whole field before checking what the Old Man wants. Keeping the request visible first helps you avoid using a useful crop on the wrong delivery.
Event Rewards and Delivery Tiers
The delivery track is split into three reward tiers. Deliveries 1 through 10 are Tier 1, deliveries 11 through 20 are Tier 2, and deliveries 21 through 30 are Tier 3. Reward quality improves as you reach the higher tiers, so the later baskets are where careful preparation pays off most.
Possible event rewards include seeds, Bananod Chests, Bananod Eggs, and other valuable items. Part Three also adds the Golden Shovel Pack. Since every completed basket gives you a choice between three rewards, take a second to compare them instead of clicking through too quickly.
Pets and Special Preparation Tools
Your pet setup decides how much waiting this event involves. Spider speeds up plant growth, which is useful for nearly every request. Liar Bird helps you produce heavier fruits, making it the pet to use shortly before harvest when the basket asks for more weight.
Kappa is the key pet for Wet mutations, while Mistletoad supplies Chilled mutations. Mimic Octopus is also helpful because its cooldown support lets you repeat your preparation cycle more smoothly. The reliable order is simple: grow with Spider, apply the needed mutation, activate Liar Bird, then harvest.
Making Wet, Chilled, and Frozen Fruits
Set aside Lily Pad, Cluster, and Bamboo for Wet requests. Plant them, let Spider shorten the growth time, and use Kappa to apply Wet before you bring in Liar Bird. Harvest only after the mutation is already in place, especially if you also need fruit weight.
For Chilled requests, focus on Glow Pod, Harp Vine, and Dragon Fruit. Spider handles the growth speed, and Mistletoad applies Chilled. Frozen Pepper needs an extra step: use Mistletoad on Pepper first, then use Kappa to combine the effects into Frozen.
Seeds and Crops to Keep Ready
The full request pool covers Tomato, Blueberry, Strawberry, Corn, Mandrake, Daffodil, Twist Berry, Apple, Fable Flour, Bamboo, Watermelon, Flare, Daisy, Pumpkin, Lily Pad, Cluster, Coconut, Glow Pod, Cactus, Dusk Buff, Dragon Fruit, Mango, Canary Melon, Harp Vine, Grape, Flare Melon, Mushroom, and Pepper.
Those seeds are your real delivery resource. Keep them organised before you begin a serious run. The mutated crops deserve priority because they take more setup, while ordinary requests can be grown afterward as the basket calls for them.
Best Farming Route for All 30 Baskets
Start by growing the mutation-sensitive plants in advance. Make a small reserve of Wet crops, Chilled crops, and Frozen Pepper before you push deep into the chain. This prevents a late request from stopping your progress while you wait for a specific plant to grow.
For the remaining crops, use Spider and Liar Bird as needed, but collect only three to five fruits at a time. Smaller harvests keep your inventory manageable and make it faster to find the exact fruit the Old Man requests. Submit one delivery, review the next request, then prepare only what you need.
Mistakes That Slow Down Progress
The biggest mistake is harvesting first and checking the basket later. You may end up with plenty of fruit but no matching mutation or enough weight for the active request. Another common issue is using Liar Bird before Kappa or Mistletoad; apply the mutation first so the final harvest has both properties.
If your time is limited, aim for steady deliveries rather than trying to stockpile every crop at once. The Reward Farming Method works best when you maintain seed reserves, save special pet effects for the matching request, and use
GAG 2 Pets for sale
from U4GM as an extra preparation option while you work toward the final Tier 3 rewards.
Read More...
whats up guys I'm back after being gone for a while


I tracked down the error of a error page getting displayed when you log in. It was due to a forum issue and I will let you know when I get the forum...I tracked down the error of a error page getting displayed when you log in. It was due to a forum issue and I will let you know when I get the forum working again... Show more


Usheera Rathnayake is friends with Niklas Poslovski
I spent the day setting up a cgit instance where Git repositories related to the Haiku project can be viewed online,now that the Haiku project has...I spent the day setting up a cgit instance where Git repositories related to the Haiku project can be viewed online,now that the Haiku project has put their official cgit instance behind a login wall due to the massive attacks by AI scrapers.My instance is free and open for everyone to use,but I can't promise perfect uptime.Let's see how long it takes until it gets overloaded by masses of bots.It's here: cgit.nikisoft.one/ Show more
Loading content, please wait.Marisa Giancarla is friends with Usheera Rathnayake
I will be updating the OS for this server to 24.04 later this evening. Will make a backup of the system right before it just in case
I've fixed the forum issue of the error appearing when logged in... Let me know if you still have problems...


beos.retro-os.live/index.php/component/users/
Is anything missing there? Loading content, please wait. 4 months ago


If you don't want to use Twitter/X we have a free mastodon server for retro-computing. Just go to mastodon.retro-os.live - sign up and get access for free! Show more

Loading content, please wait.Today I finally published my new website,on which I worked for the last few weeks.It is completely redesigned and makes it clear without any doubt...Today I finally published my new website,on which I worked for the last few weeks.It is completely redesigned and makes it clear without any doubt that my full priority is now on Haiku applications and Haiku contributions.It features introductions for my Haiku-native applications and has a huge list of other projects of all sorts you may find useful. www.nikisoft.one Show more
Loading content, please wait.Due to the spam i am trying to enable akismet. Let me know if it blocks legit content...


If things go well,I'll soon be a member of the Haiku Support Association e.V. Just sent my membership request.Last BeGeistert event was many years...If things go well,I'll soon be a member of the Haiku Support Association e.V. Just sent my membership request.Last BeGeistert event was many years ago.Maybe,if enough interested people join,something like that is possible again in the future.In case you don't know the HSA: haiku-support.org/index-eng.html Show more
Loading content, please wait.
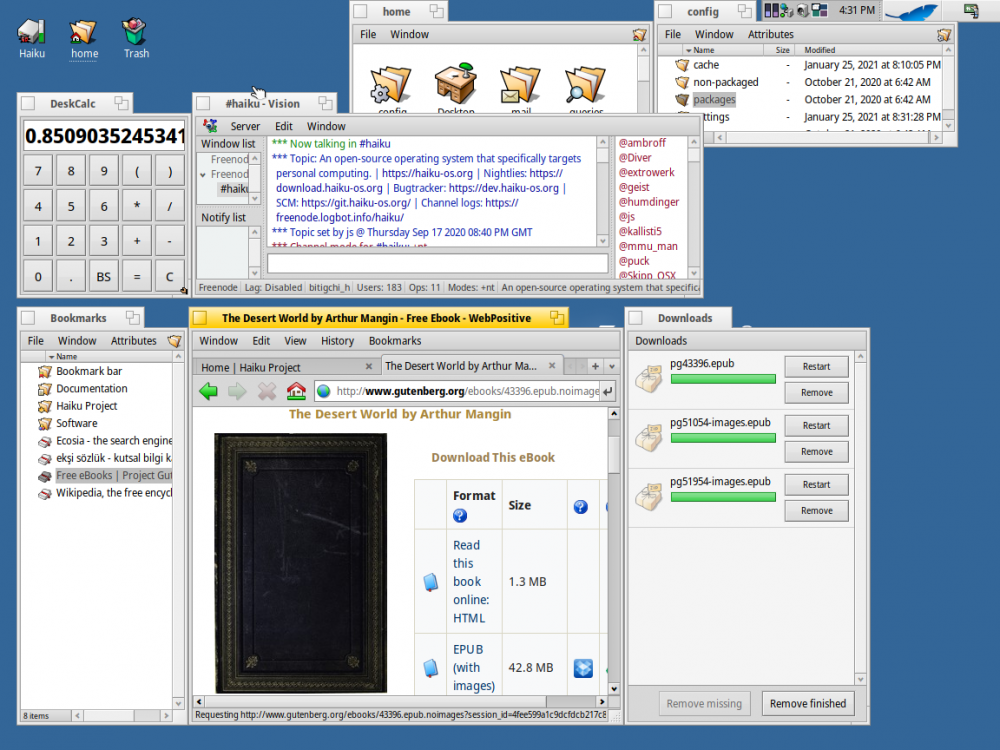
well sorry guys my forums gone but i now have a new unrelated irc server